How to update your MyAir5, e-zone or Zone10e system via Google Play Store (2).
Adding a Google Play Store account to your MyAir5, e-zone or Zone10e controller ensures your apps are kept up to date with the latest Advantage Air software.
Please follow these steps below to add a Google Play Store account; these instructions assume you do not have an existing Google/Gmail account. If you do have a Google/Gmail account you will need to select “Existing” at Step 12 then jump ahead to step 24 & follow the prompts.
Step 1 – Press the SETTINGS button.
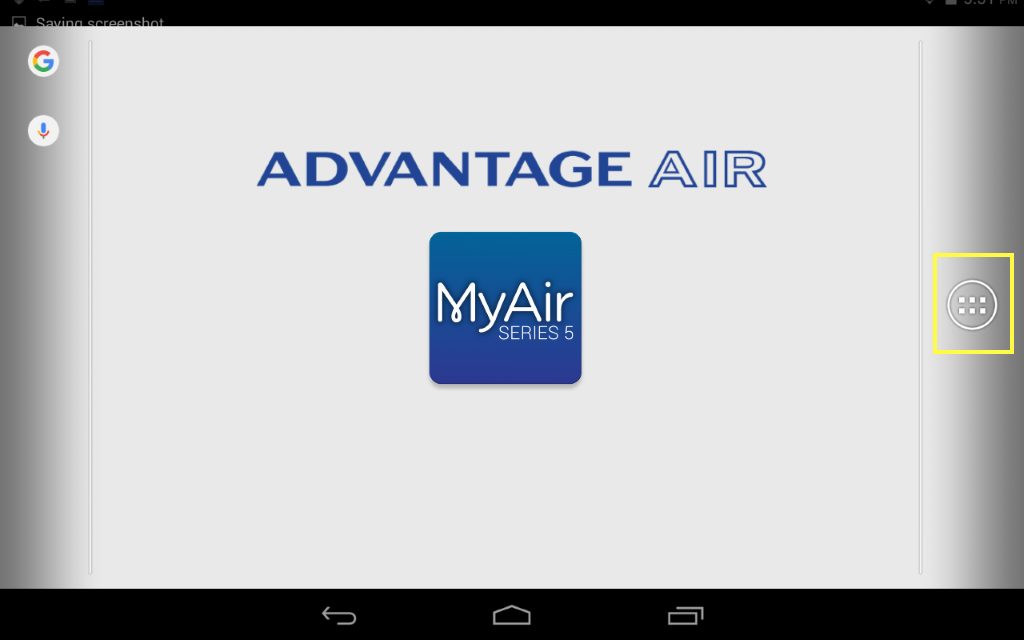
Step 2 – Press the APP draw button (Circle with 6 dots inside).
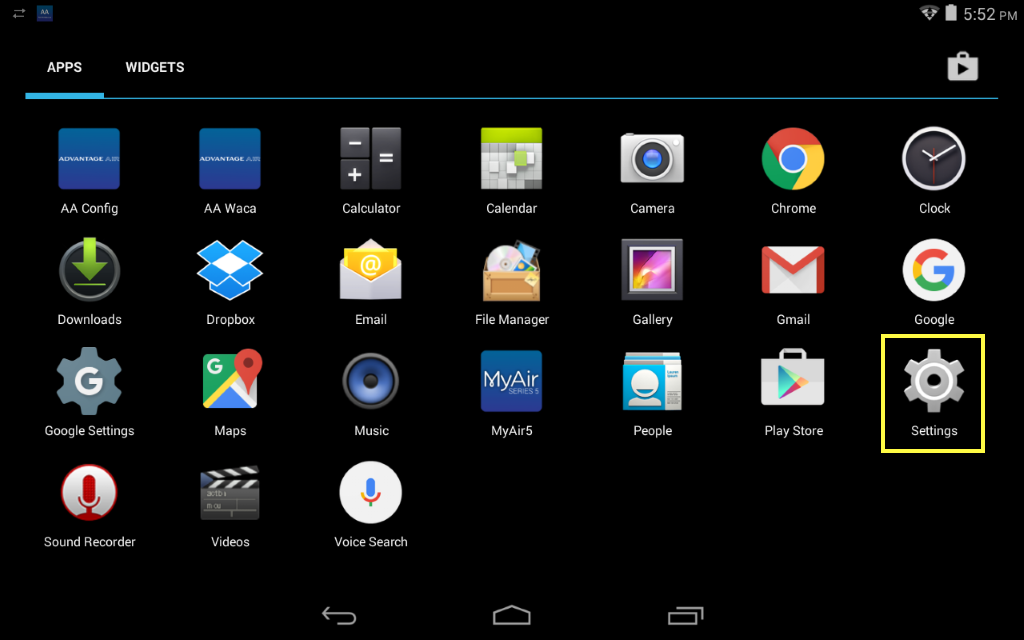
Step 3 – Press the settings button.
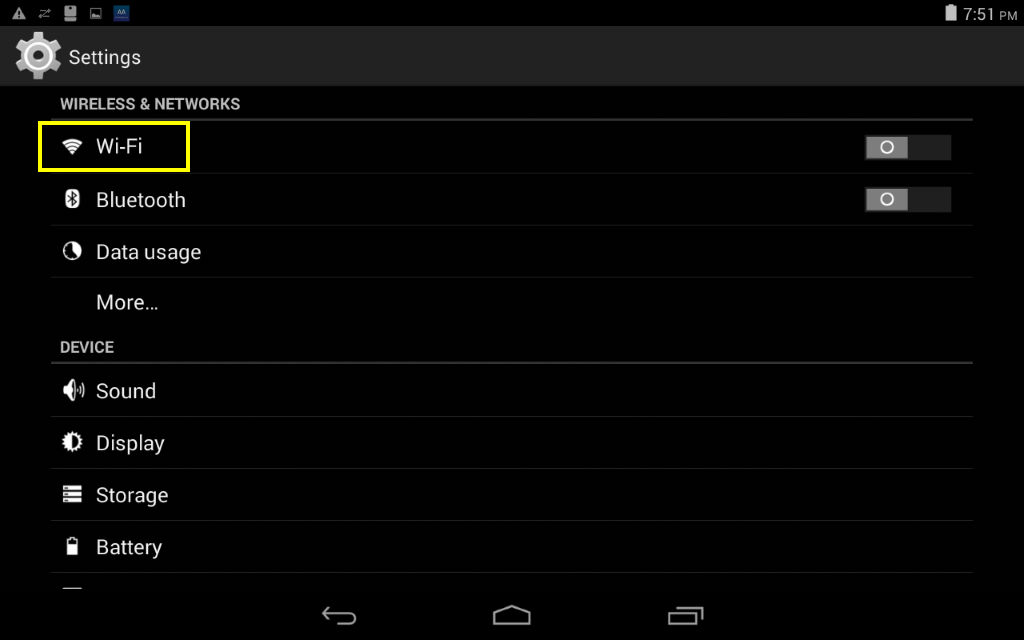
Step 4 – Press the Wi-Fi button.
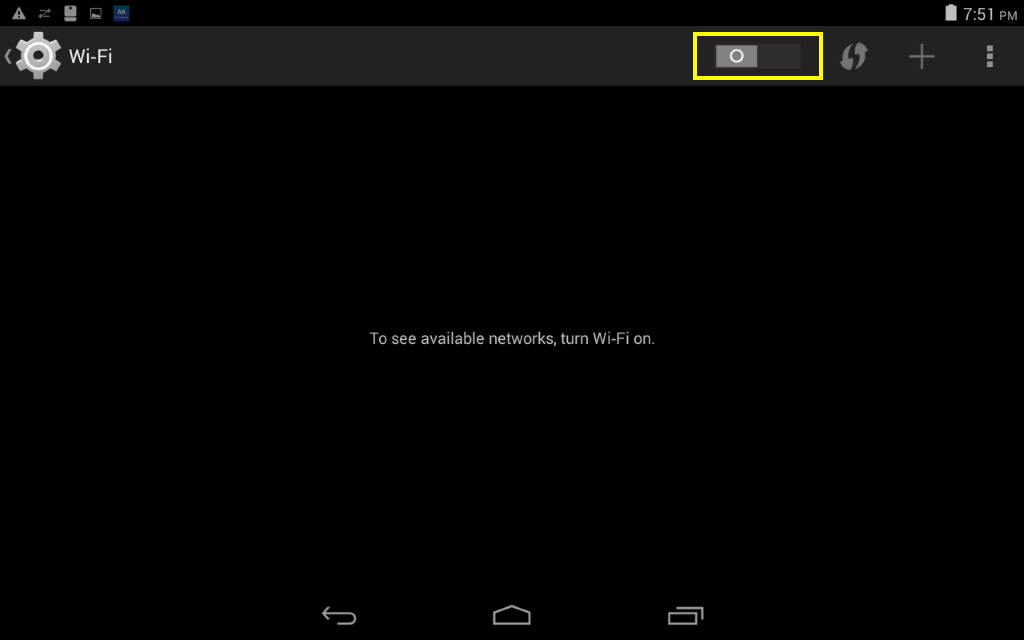
Step 5 – Ensure you are connected to your home Wi-Fi network, if it is OFF as shown in the image above press the switch to turn it ON.
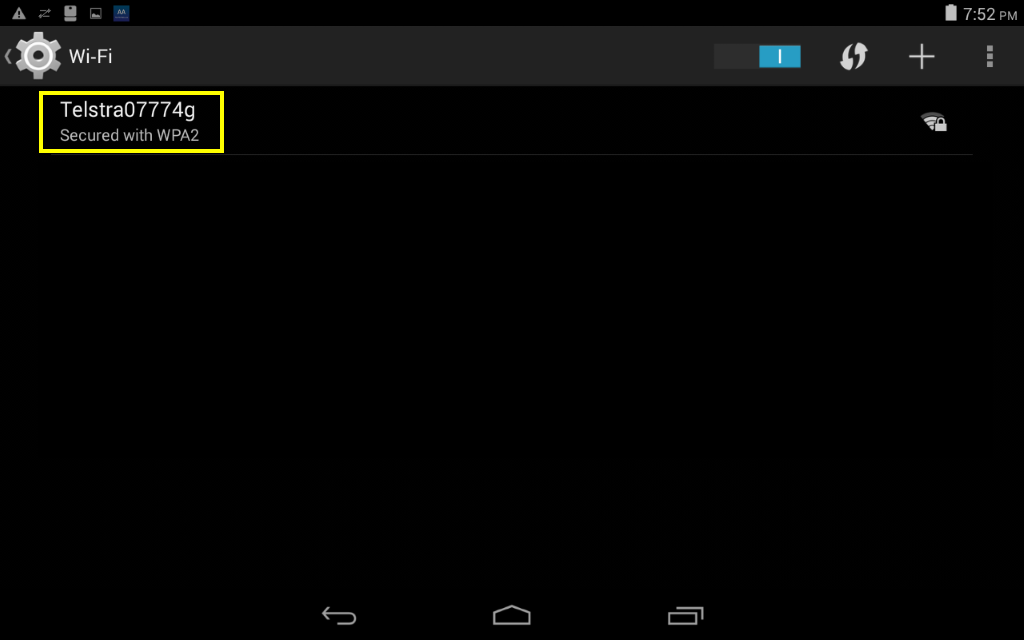
Step 6 – Find your home Wi-Fi network in the list then press it.
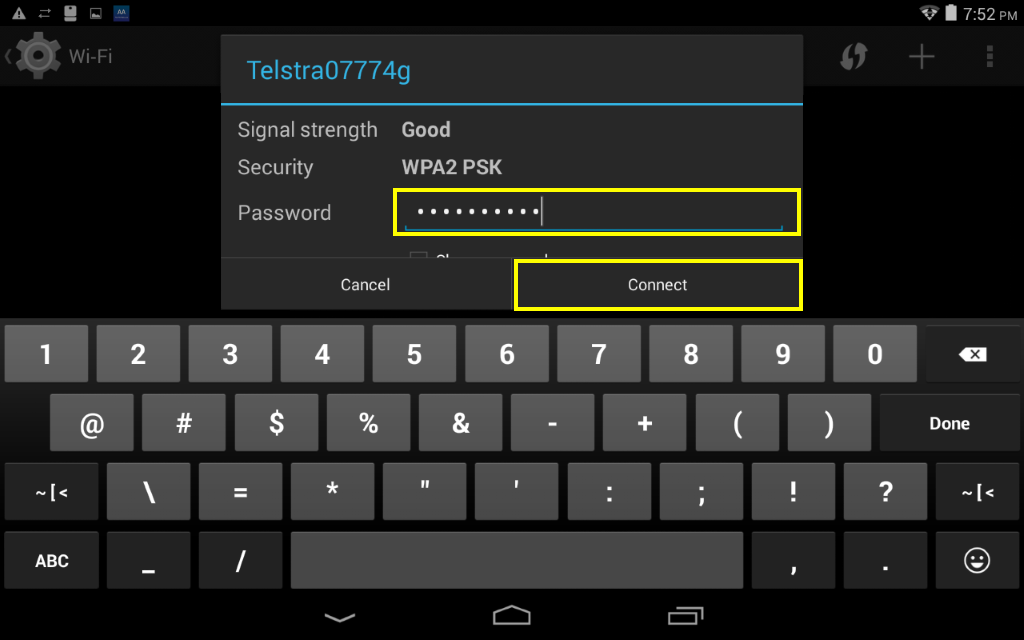
Step 7 – Enter your home Wi-Fi network password then press CONNECT.
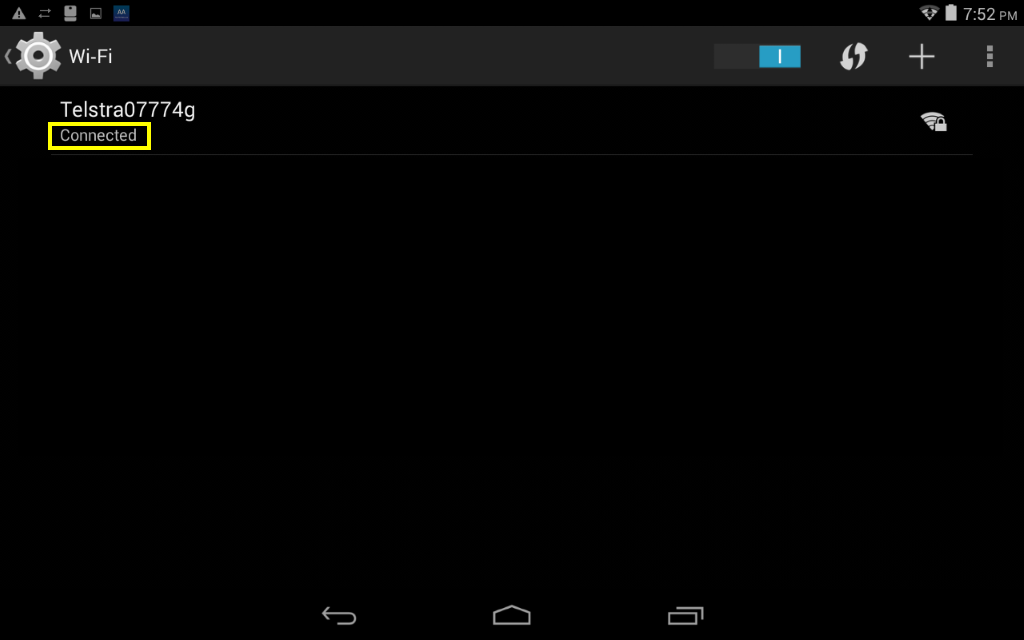
Step 8 – Once you have connected successfully (may take 5 minutes) you will see the word CONNECTED below your home Wi-Fi network name as per above image, when you see this proceed to Step 9.
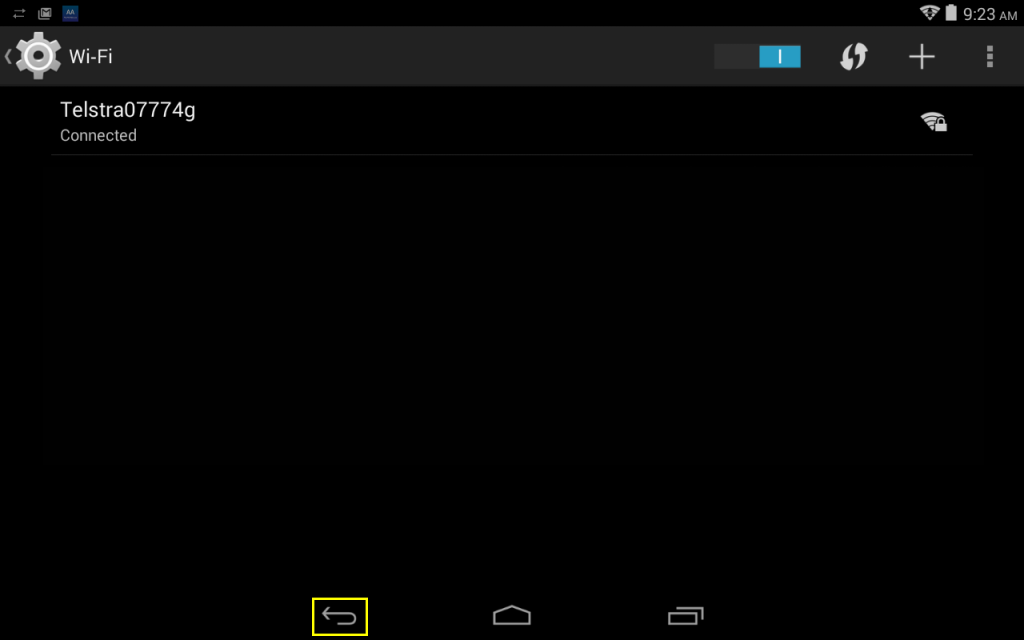
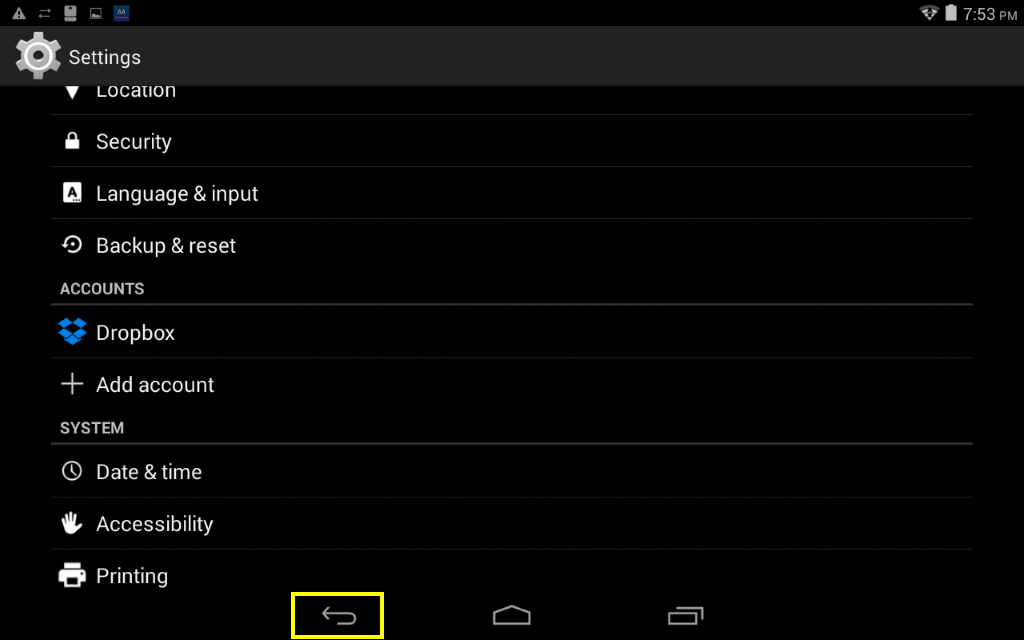
Step 9 – Press the back button.
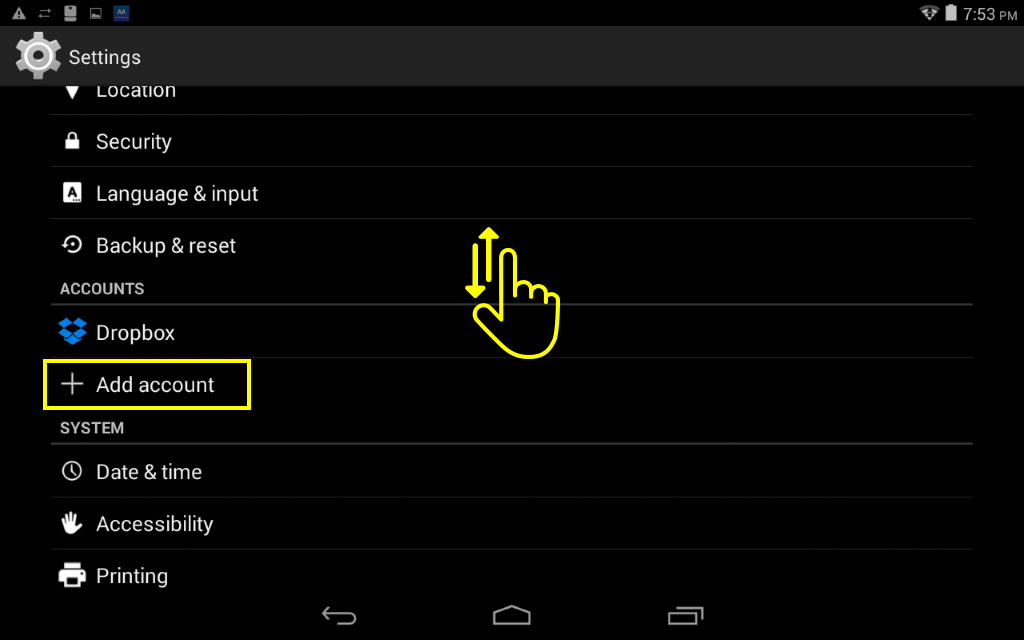
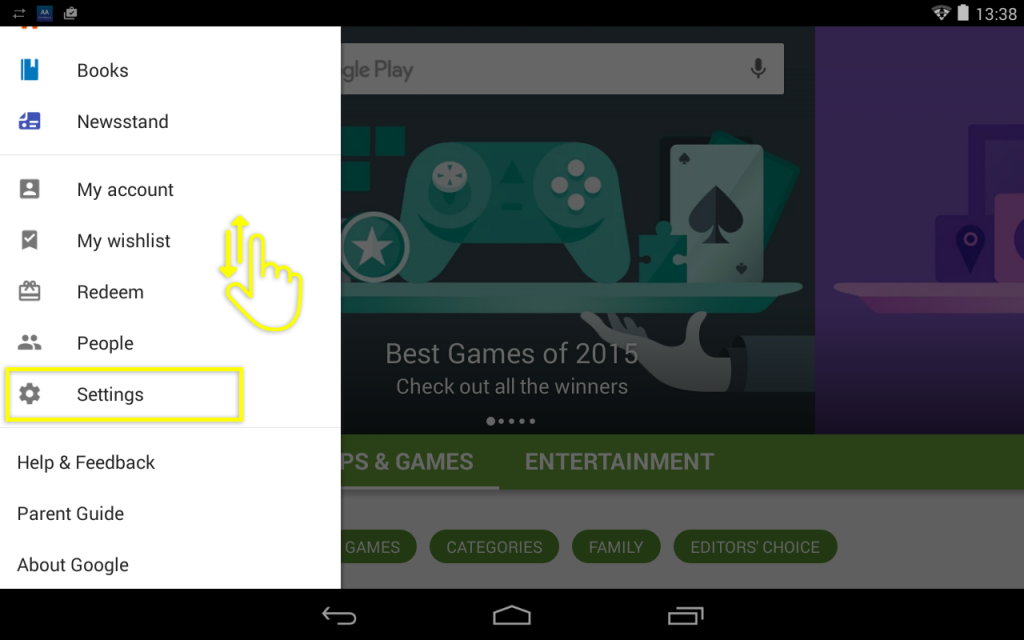
Step 10 – Scroll down the menu on the left by pressing near the bottom of the screen & dragging upwards; when you see the ACCOUNTS menu press ADD ACCOUNT.
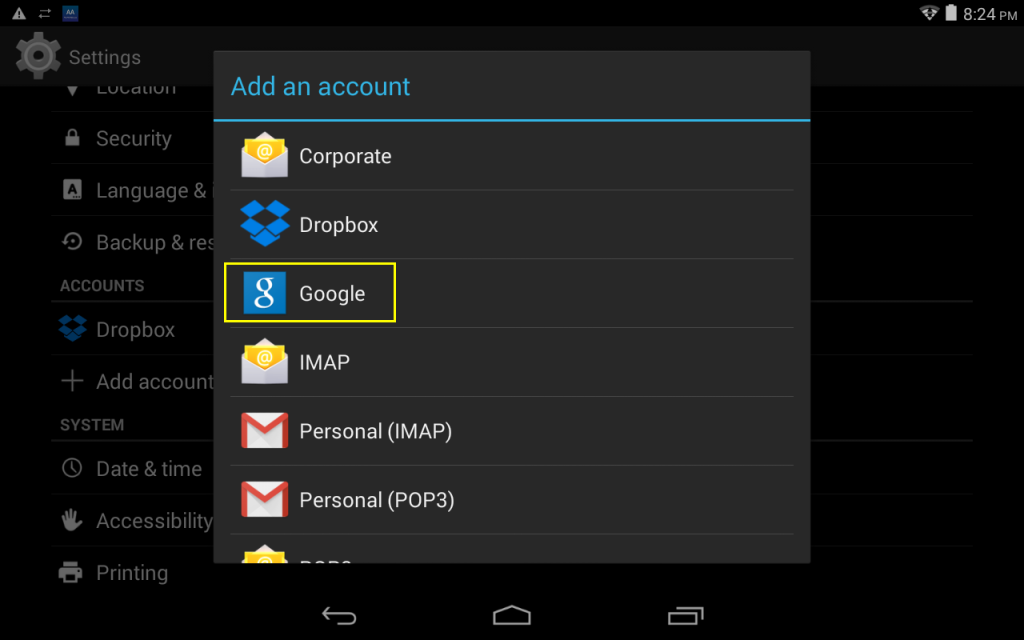
Step 11 – Press the blue Google icon.
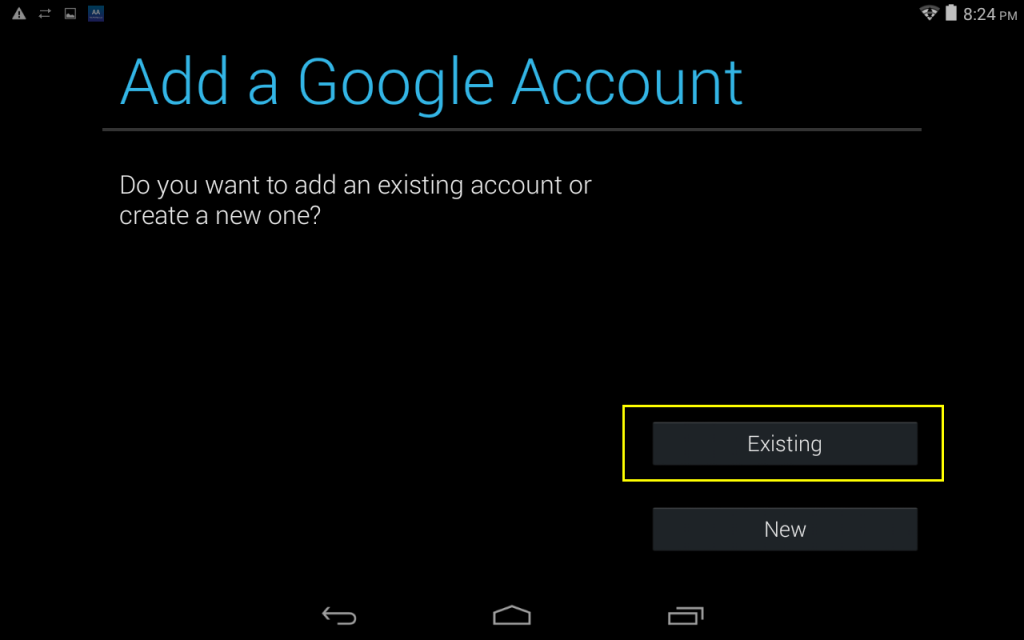
Step 12 – Now you have the option to create a new account or use an existing Google/Gmail account, we are going to press NEW for this exercise but if you already have a Google/Gmail account simply press EXISTING & then follow the instructions from STEP 24.
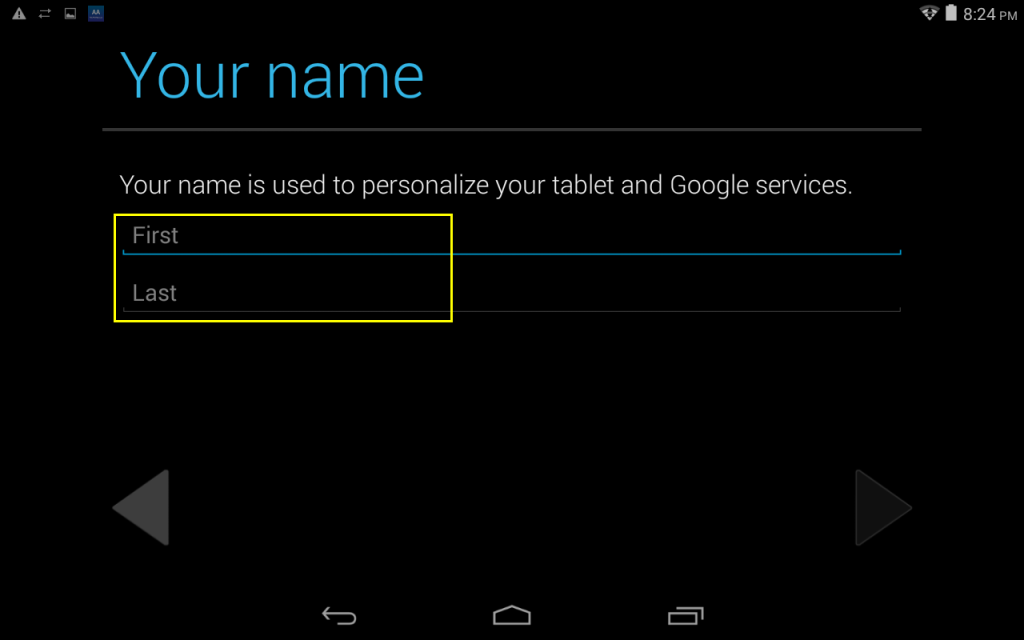
Step 13 – Enter a first & last name then press the PLAY ARROW.
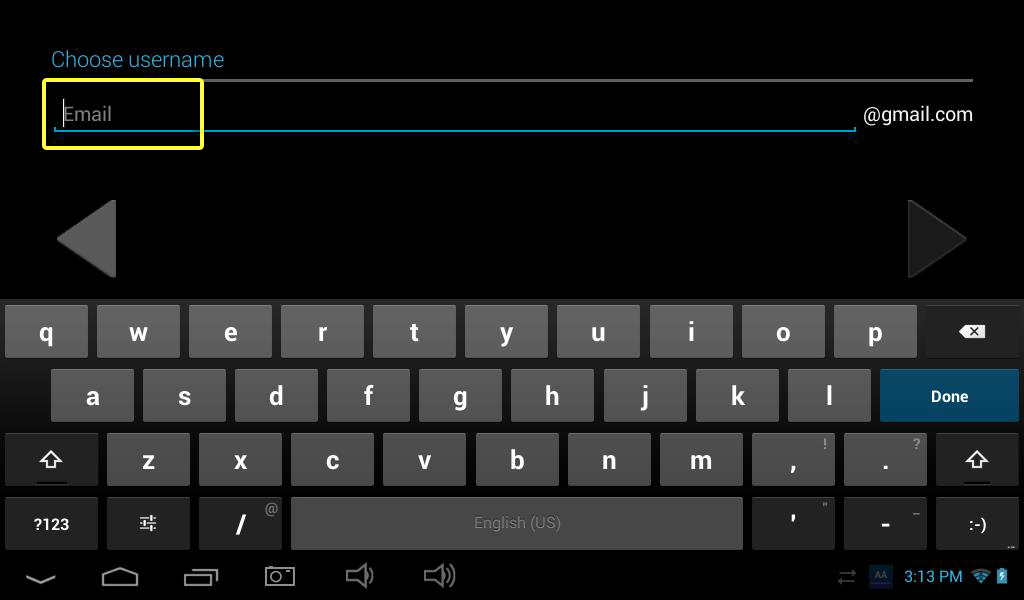
Step 14 – Enter your desired username then press the PLAY ARROW, if you’re chosen username is already taken you will be given the opportunity to select an alternate name.
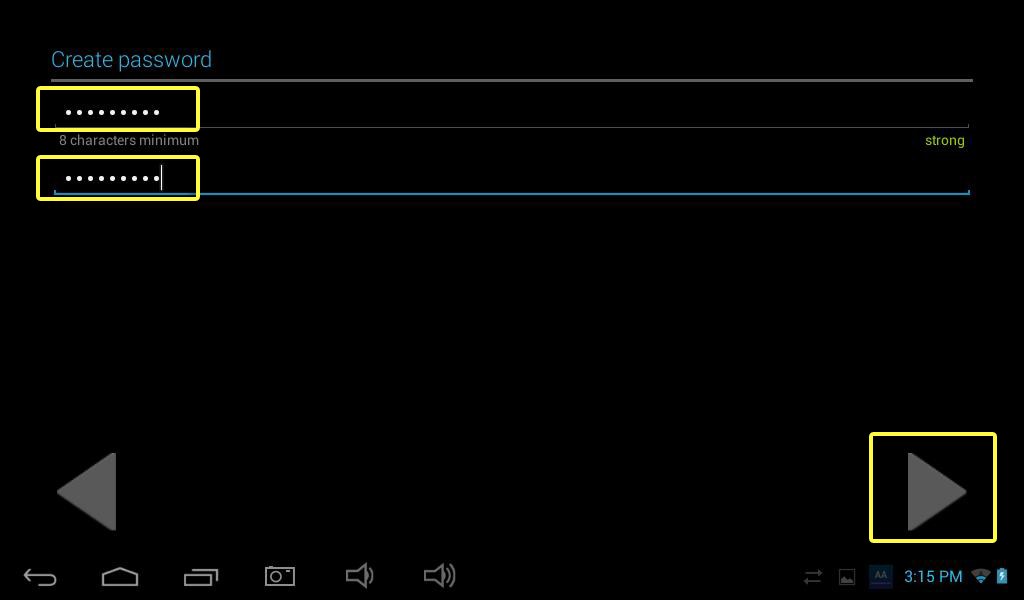
Step 15 – You will now need to create a password; you must use a password that is at least 8 characters then enter the password a second time to confirm & press the PLAY ARROW.
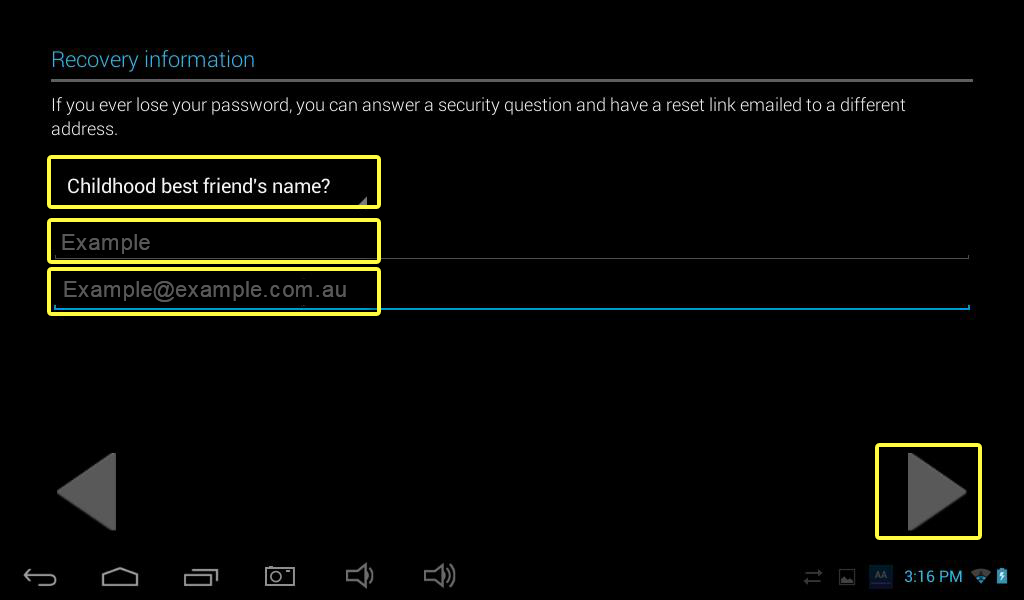
Step 16 – Choose a security question & enter your answer in the first text box then enter an alternate email address (optional) that can be used to email your password reset instructions if required in the future, when done press the PLAY ARROW.

Step 17 – You will now asked if you would like to join Google+ this is Googles social media website (Facebook alternative); we are going to click NOT NOW you can always explore Google+ at a later stage.
Step 18 – In the top left of the screen choose if you would like to turn on/off web history for this device & if you would like to be kept up to date with news & offers from Google Play then press the PLAY ARROW.
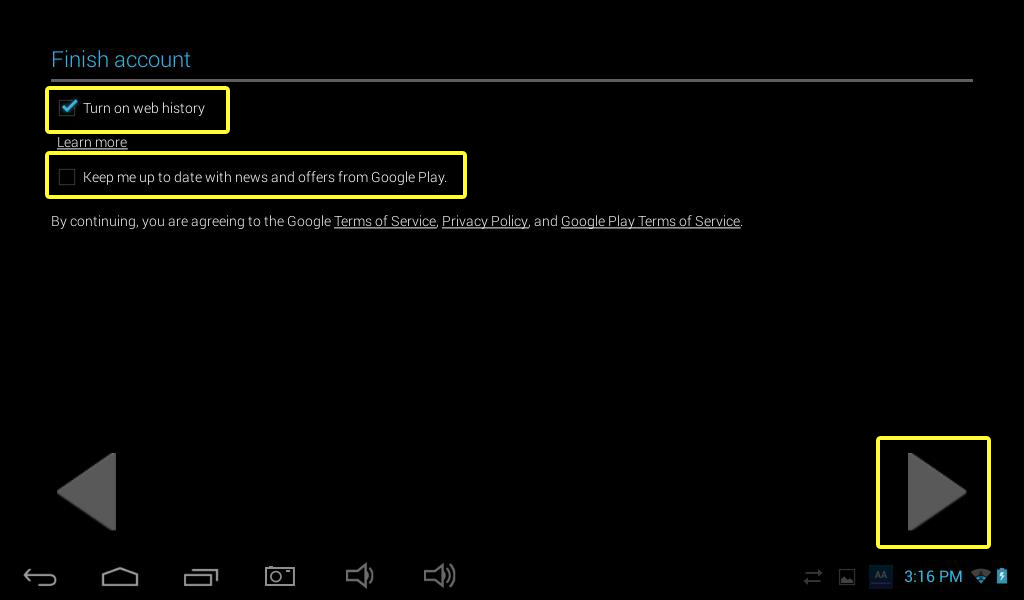
Step 18 – In the top left of the screen choose if you would like to turn on/off web history for this device & if you would like to be kept up to date with news & offers from Google Play then press the PLAY ARROW.
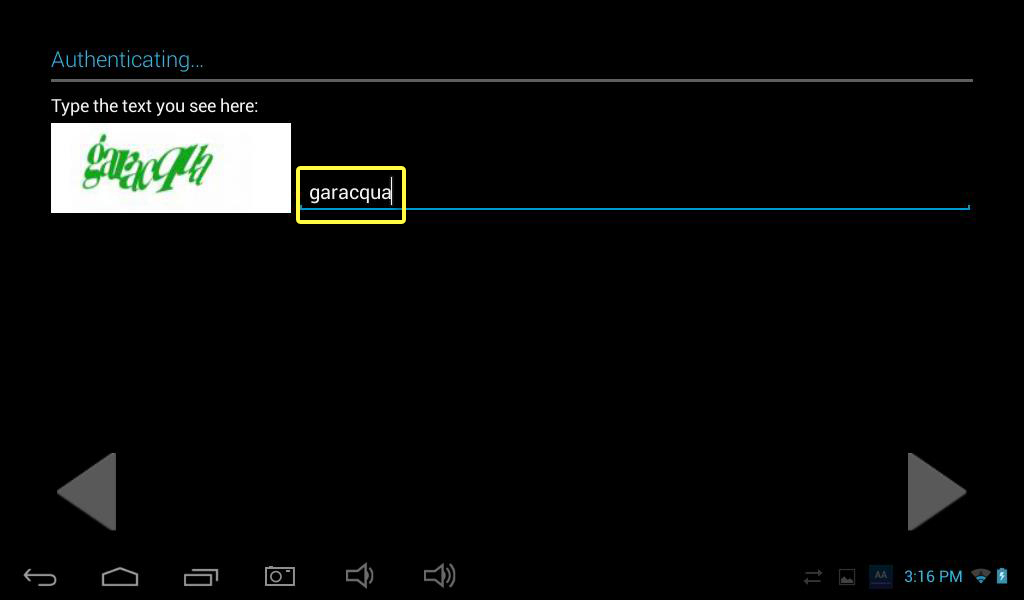
Step 19 – Enter the text shown in the picture to prove you are not a robot then press the PLAY ARROW.
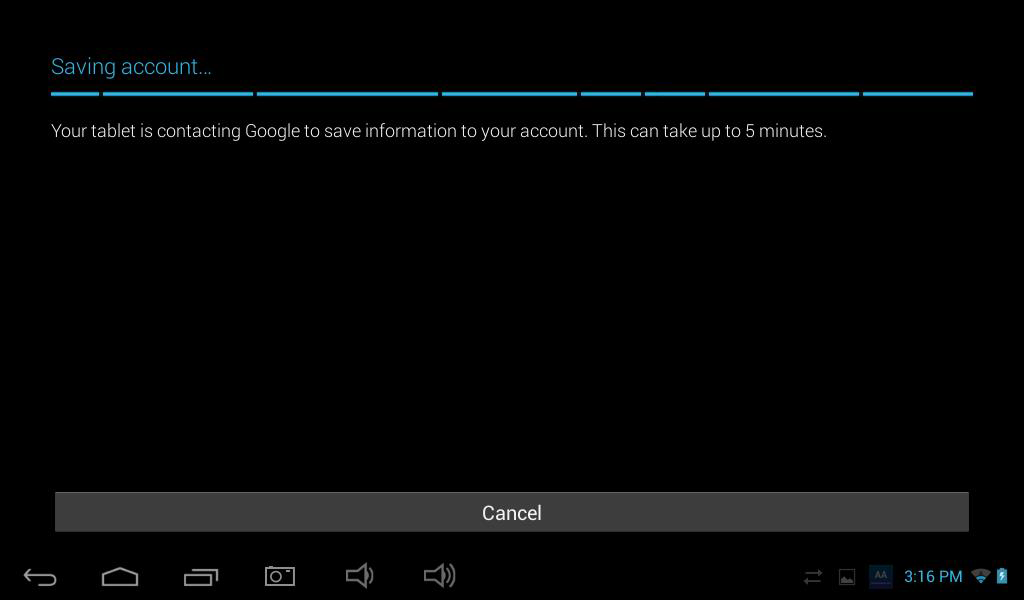
Step 20 – Your settings & account will now be saved, this can take up to 5 minutes.
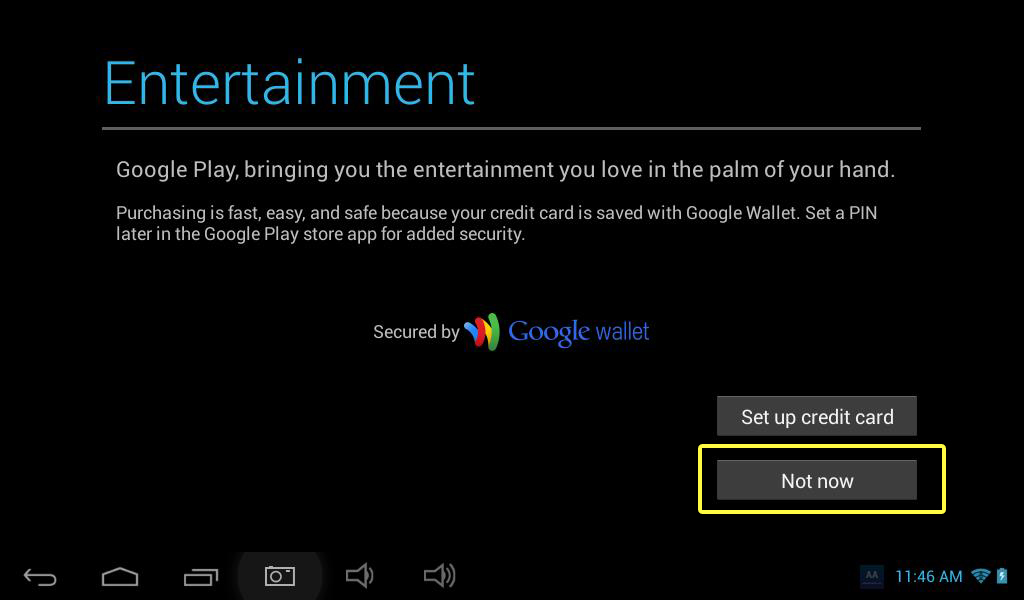
Step 21 – You will now be asked if you would like to add your credit card details; this is used if you wish to purchase apps on the Google Play Store. To keep your MyAir4/e-zone apps up to date you do not need to set up a credit card so press NOT NOW, you can always add these details later.
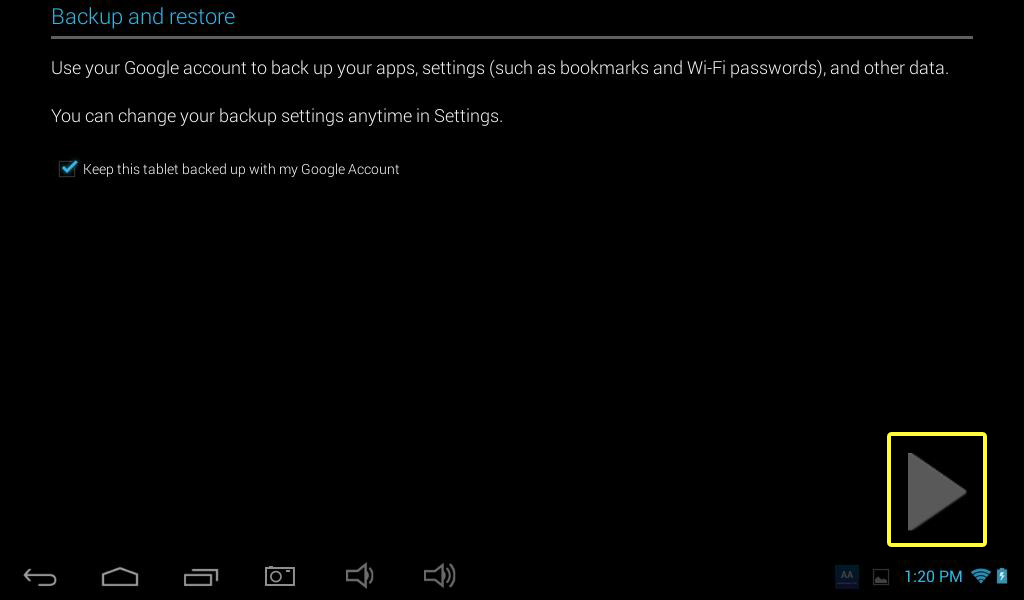
Step 22 – You are now asked if you would like your tablet to be backed up with your Google account, it is completely your choice if you would like to use this feature. Check or uncheck the box as desired then press the PLAY ARROW.
Step 23 – Press RETURN button to go back to the app drawer screen.
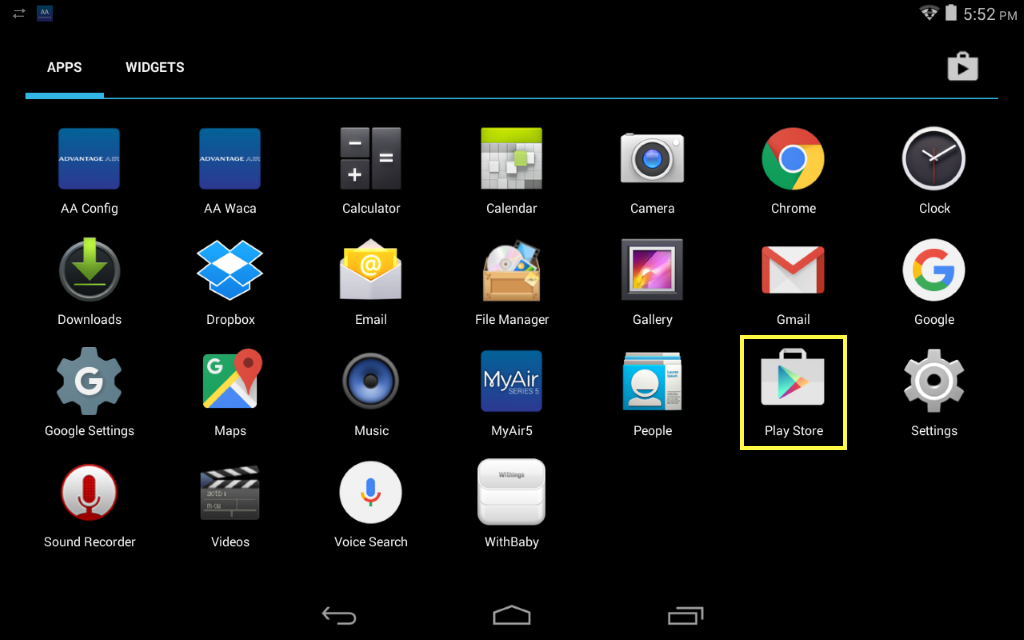
Step 24 – Press the Play Store app button.
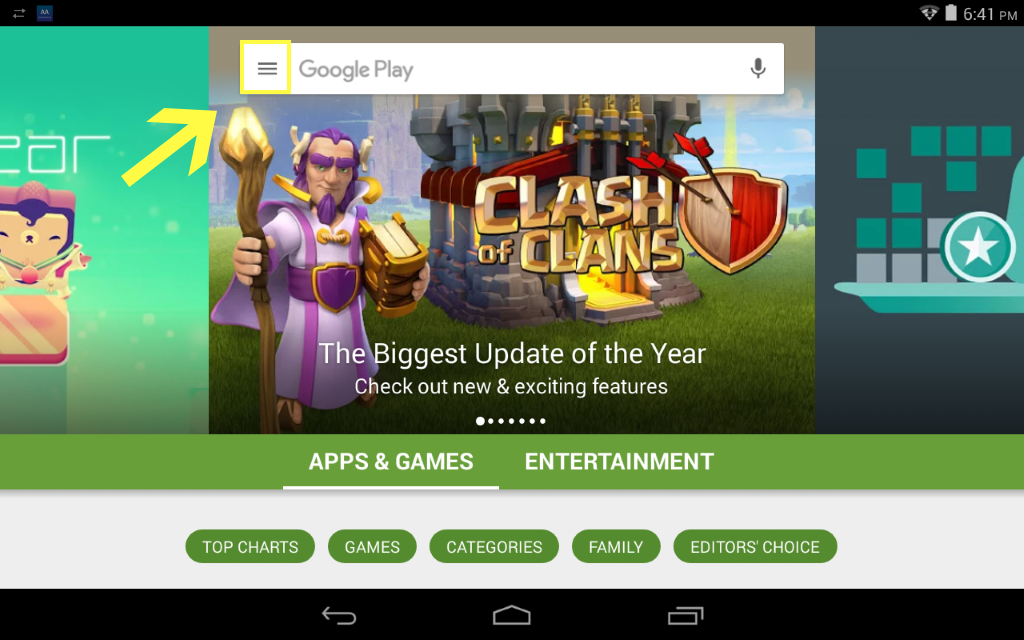
Step 25 – Press the menu button.
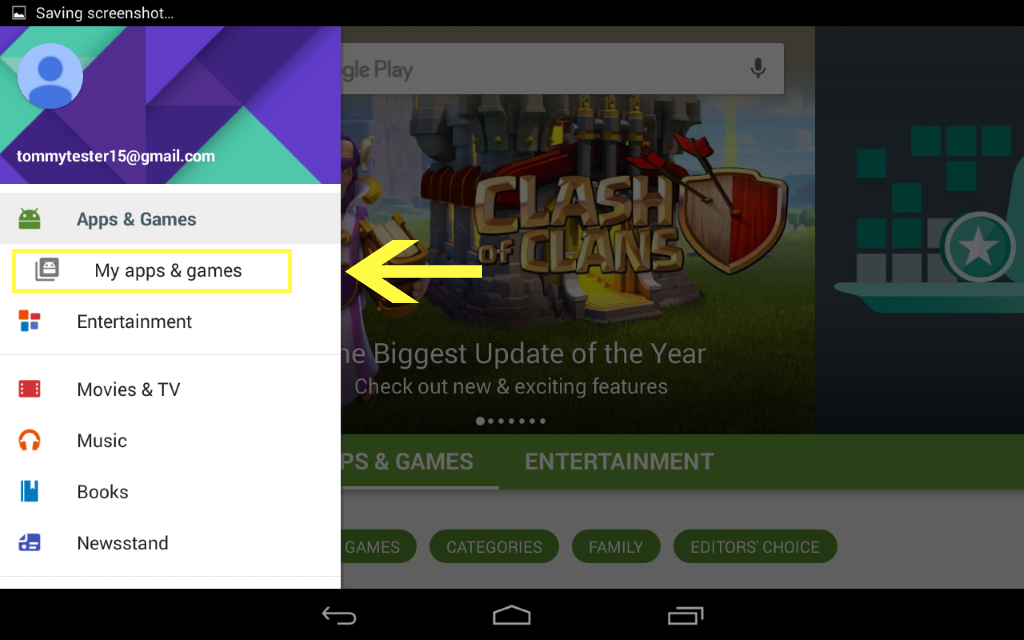
Step 26 – Press the “My apps & games” button.
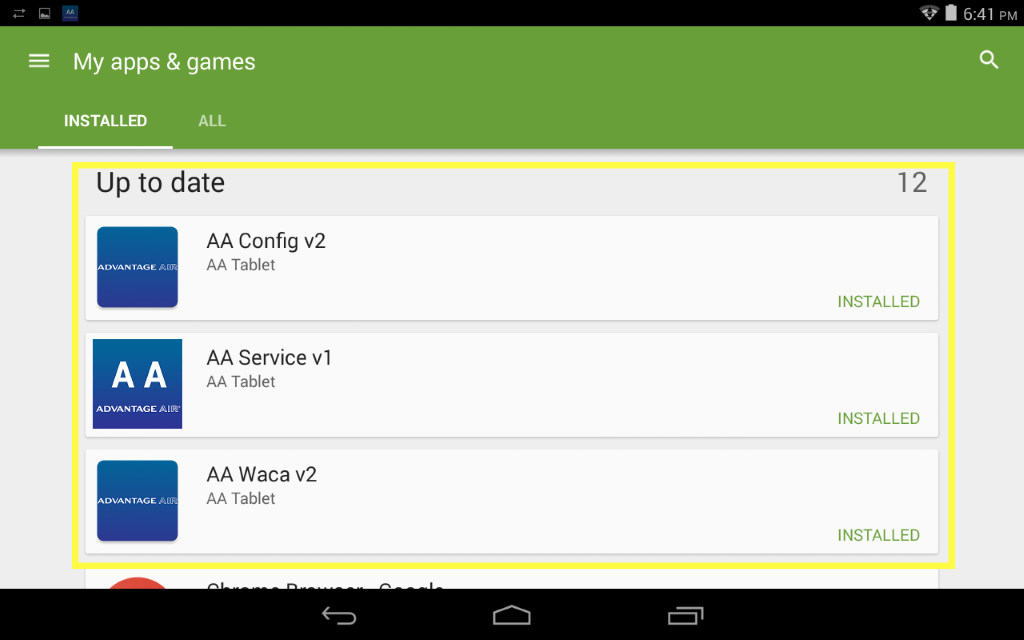
Step 27 – Find the 3 apps shows in the image above, if there is an “UPDATE” button displayed next to any of them press it to update that app. HINT: If the there is an update all button shown at the top right of this list use that to update all apps on the MyAir5, e-zone or Zone10e tablet.
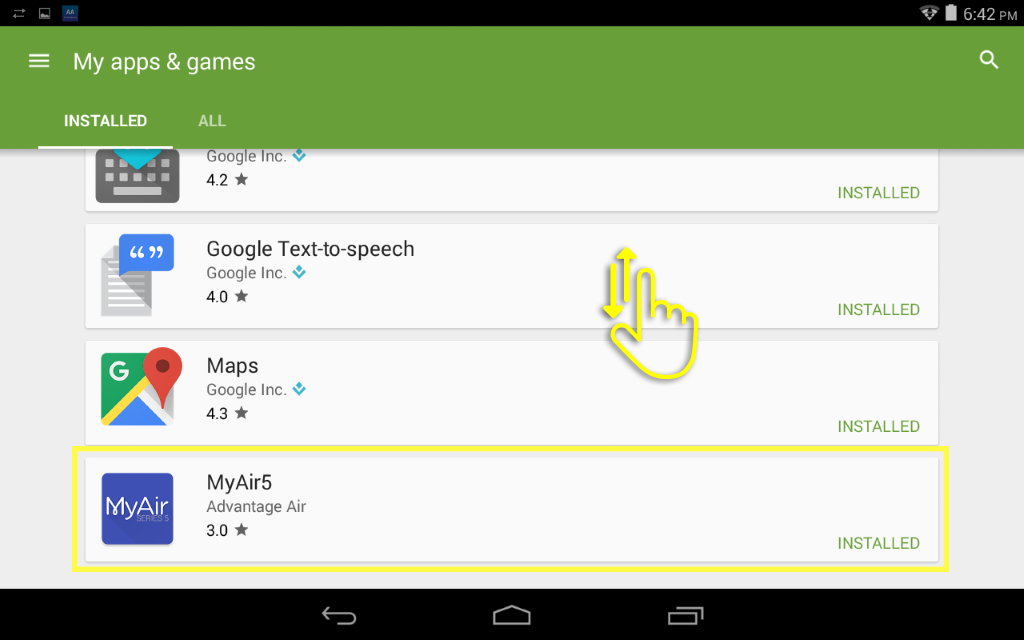
Step 28 – Scroll down until you find the MyAir5, e-zone or Zone10e app applicable to the system you have installed in your home then if the word “UPDATE” is displayed next to it press it it & update the app.
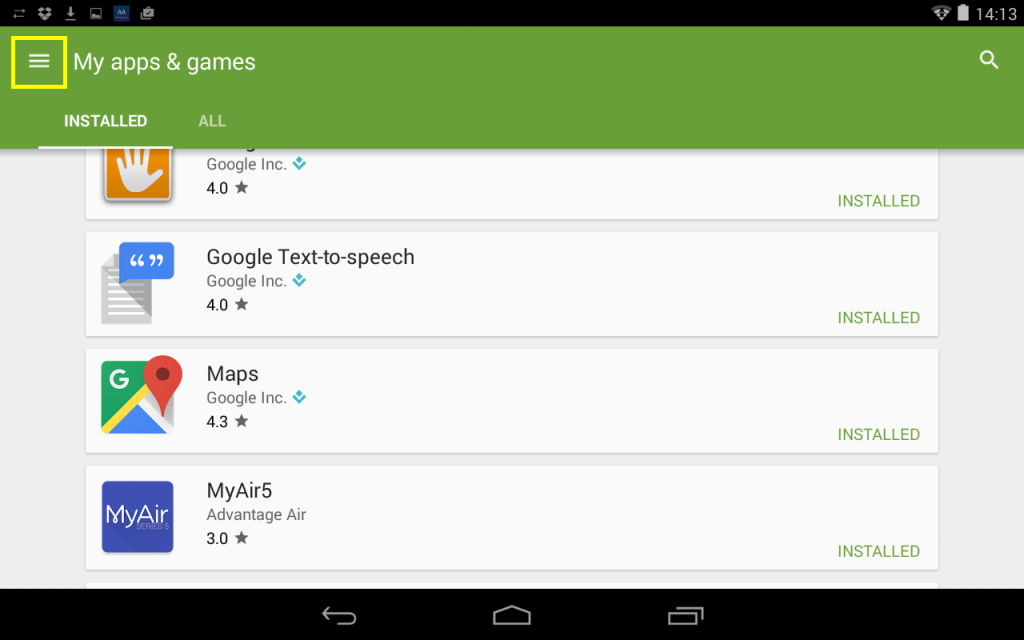
Step 29 – Press the menu button at the top left of the screen.
Step 30 – Scroll down & press SETTINGS.
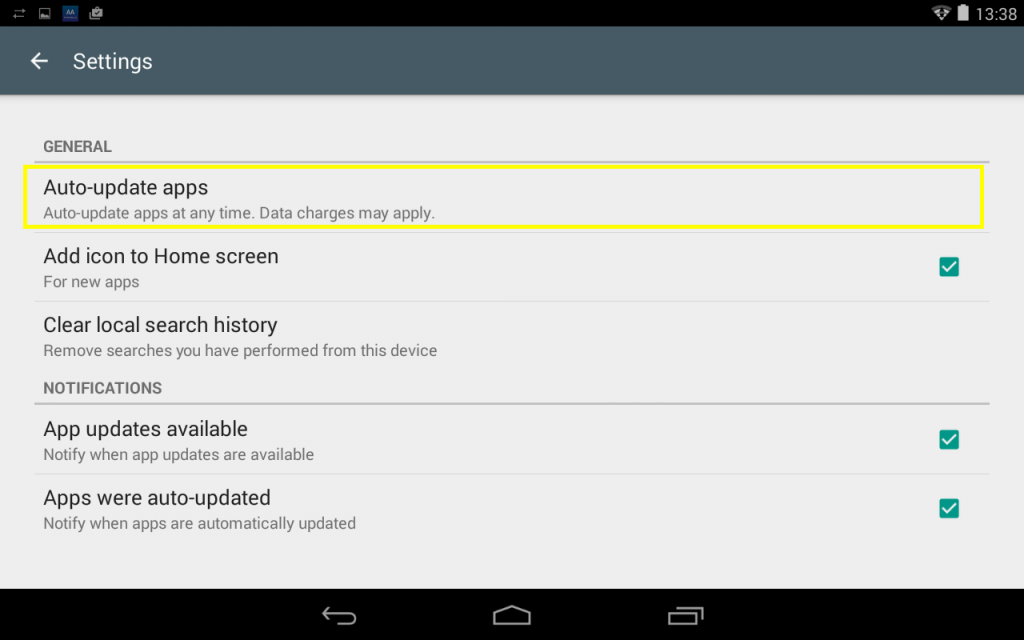
Step 31 – Press “AUTO UPDATE APPS”.
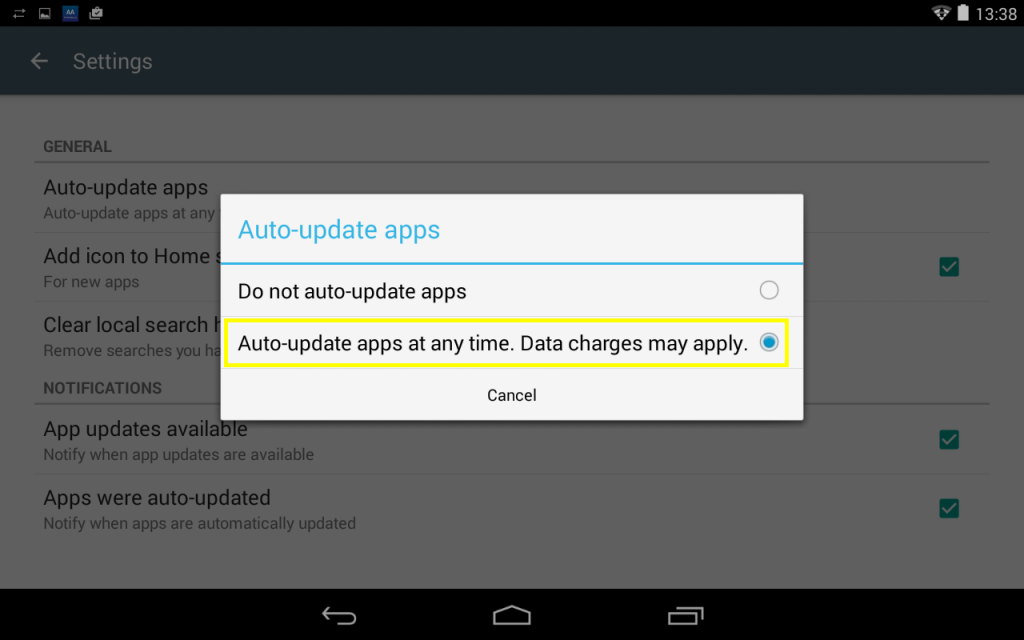
Step 32 – Ensure “AUTO UPDATE APPS AT ANY TIME” is selected.
Congratulations you now have the latest Advantage Air Apps & your tablet will now be automatically kept up to date with the latest software going forward.
Enjoy.